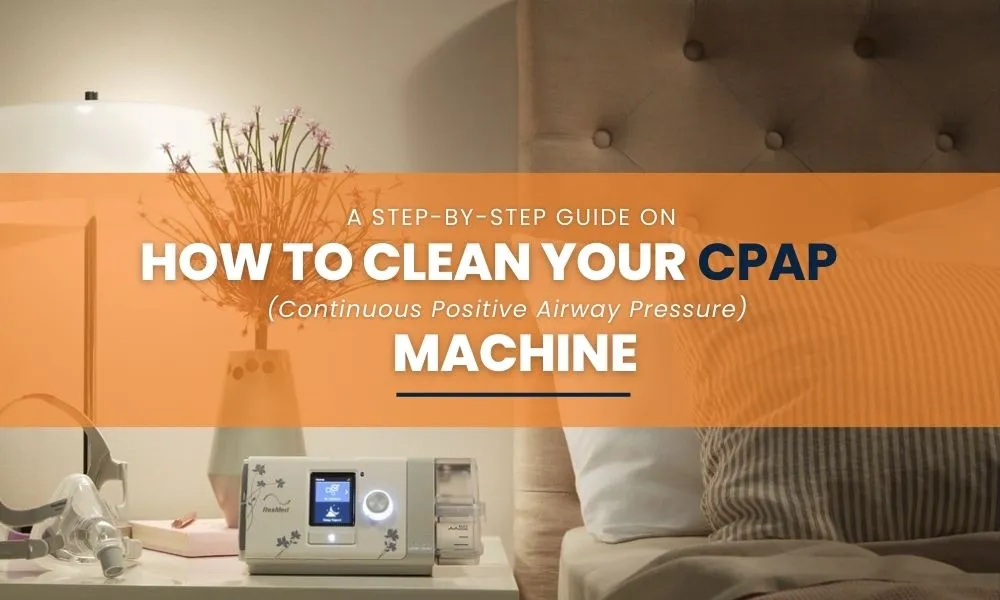
A CPAP (Continuous Positive Airway Pressure) machine is designed to provide you with a constant stream of air pressure to help you breathe smoothly during sleep, especially if you suffer from sleep apnea. However, just like any other piece of medical equipment, a CPAP machine requires periodic cleaning to maintain its effectiveness and safety.
So, why is cleaning a CPAP machine so important?
A well-maintained CPAP machine is essential for effective treatment and your overall health. Regular cleaning prevents the buildup of bacteria, mould, dust, and allergens which can lessen the machine’s effectiveness and longevity.
Furthermore, it ensures the air you breathe is clean and healthy. Skipping the cleaning routine isn’t just bad for your device – it’s a potential risk to your health.
So, how can you protect yourself from these health hazards? We, at Rockingham CPAP, have the ultimate solution for you. In this article, we offer a step-by-step guide on how to thoroughly clean your CPAP machine, ensuring it’s safe for nightly use.
Cleaning Schedule and Frequency
Maintaining a regular cleaning schedule for your CPAP machine is crucial to ensuring its effectiveness and durability. Not all components of the machine need to be cleaned at the same frequency, making it important to understand the recommended cleaning schedule for each part.
Recommended Cleaning Schedule for Different CPAP Components
Different parts of the CPAP machine have different exposure to moisture, bacteria, and dust, thus requiring unique cleaning frequencies. Below is the recommended schedule for each component:
CPAP Mask
Your mask should be cleaned daily, as it comes in direct contact with your face and accumulates facial oils and sweat. Cleaning your mask regularly not only ensures hygiene but also provides a more comfortable experience. Additionally, frequent cleaning helps prevent the mask from losing its seal over time. Use gentle soap and warm water, being sure to rinse all soap residue off thoroughly.
CPAP Tubing
Flexible tubing delivers air from the machine to your mask and should be cleaned weekly. Detach the tubing, submerge it in warm soapy water, and gently clean the inner and outer surfaces. Thoroughly rinse the hose to remove any soap residue and let it air dry.
Humidifier Water Chamber
This component should be cleaned every week unless your device’s manufacturer suggests a different cleaning frequency. Empty the water chamber daily and let it air dry. On a weekly basis, soak the chamber in a solution of warm water and mild soap or white vinegar to effectively remove mineral deposits. Rinse thoroughly to ensure no residue remains and let it dry completely before reuse.
CPAP Filter
Depending on the type of filter your machine uses, the cleaning requirements might vary. Disposable filters should be replaced every two to eight weeks, while reusable foam filters need to be cleaned every two weeks. Gently rinse the reusable foam filter in warm water, allow it to air dry, and reinsert it into the machine once completely dry.
Always refer to your CPAP machine owner’s manual for specific cleaning instructions and follow the guidelines provided by the manufacturer.
Importance of Daily and Weekly Cleaning Routines
You might be wondering, “Why is there such an emphasis on daily and weekly cleaning routines?” Well, these routines play a fundamental role in maintaining the efficiency of your CPAP machine and safeguarding your health. Below, we outline the importance of sticking to these routines:
Minimises Risk of Infection
Daily and weekly cleaning routines significantly reduce the risk of infections. Bacteria and mould thrive in moisture and can multiply rapidly in spaces like your CPAP machine’s tubing and humidifier water chamber if not cleaned regularly.
Optimizes Machine Efficiency
Regular cleaning ensures the machine’s components are functioning at their fullest. For instance, cleaning the filler regularly maintains optimal air quality and minimises the strain on your CPAP machine, therefore prolonging its lifespan.
Prevents Unpleasant Odours
Residual moisture can lead to foul odours over time, which could affect the comfort of your CPAP therapy. Cleaning the machine regularly helps to combat these odours, making each therapy session as comfortable as possible.
Prevents Skin Irritation
If not cleaned regularly, your mask can accumulate facial oils and sweat, which may lead to skin irritation and discomfort. Daily cleaning of the mask ensures both hygiene and comfort, making your CPAP therapy experience more enjoyable.
Maintains Comfort and Effectiveness of Mask Seal
A dirty mask may not seal as effectively, leading to air leakage that can compromise the success of your therapy. Regular cleaning helps maintain the mask’s seal to ensure effective therapy.
Define your purpose, beyond just cleaning for the sake of cleaning. Remember, your health and the quality of your sleep are the top priorities.
Benefits of Maintaining a Consistent Cleaning Schedule
Regular and consistent cleaning routines for your CPAP machine do more than just keeping to functional – they come with a range of advantages that improve your sleep therapy and overall health. Let’s deep dive into the benefits of diligently maintaining a cleaning schedule:
Improved Sleep Quality
A clean, optimally working CPAP machine will deliver the right pressure consistently, leading to uninterrupted and more restful sleep. A dirty filler or mas could impact the machine’s efficiency, disrupting your sleep.
Extended Machine Life
Regular and systematic cleaning significantly enhances the lifespan of your CPAP machine. By preventing buildup of residue on any component, you’re ensuring that every part performs at its best for an extended period.
Reduced Health Risks
Consistent cleaning of your CPAP machine drastically reduces the risk of respiratory infections, skin irritations, and allergies. A clean CPAP unit is a safe one, harbouring far fewer bacteria and allergens.
Cost-Efficiency
A well-maintained CPAP machine implies less frequent replacement of parts and reduced chances of damage, saving you money in the long run. Remember, prevention is always cheaper than cure!
Improved Comfort and Treatment Efficacy
A clean mask offers a better fit and improved comfort during use. This not only makes your overall experience more pleasurable, but it also enhances the overall effectiveness of your treatments.
Greater Peace of Mind
Knowing that your CPAP machine is clean and safe to use can provide considerable mental comfort. You’re able to focus on getting a good night’s sleep, without worrying about the risks associated with dirty equipment.
Adherence to a cleaning routine is not just about cleanliness, it’s an investment in your health and your CPAP machine’s durability.
Step-By-Step Cleaning Process
Now that we’ve covered the “why,” let’s move on to the “how” part of the process. Cleaning your CPAP machine might seem daunting at first glance, but when broken down into steps, you’ll find it’s surprisingly simple and very manageable.
1. Preparation
Before we start cleaning, it’s important to make a small preparation. Having everything you need on hand will make the cleaning process seamless and efficient.
Gather Necessary Cleaning Supplies
The key to cleaning your CPAP machine effectively lies in using the right supplies. For most of the cleaning process, all you will need is mild soap, warm water, and a clean, soft cloth. Mild soap is preferable because it’s less likely to break down the material of your CPAP machine’s components over time. Make sure the cloth is lint-free to avoid leaving residues that could interfere with the machine’s operation.
Ensure the CPAP Machine is Unplugged and Disconnected from Power Source
Safety always comes first. Before you start cleaning, make sure your CPAP machine is unplugged and disconnected from its power source to prevent electric shock. Plus, you wouldn’t want moisture sleeping into the electronic components of your machine as this could damage it.
2. Cleaning the Mask and Tubing
The mask and tubing are crucial components of your CPAP machine that come in direct contact with your face and the air you breathe. Keeping them clean and residue-free is essential to ensure optimal therapy and minimise the risk of infections. Follow these steps to clean them effectively:
Disassemble the Mask, Headgear, and Tubing
Gently remove the mask, headgear, and tubing from your CPAP machine. If necessary, consult your machine’s user manual to understand how to disassemble these components correctly.
Wash the Mask and Headgear
Using mild soap and warm water, gently clean the mask and headgear. Make sure you remove any facial oils, dirt, or residue which can lead to leaks or other issues. Avoid using harsh chemicals or abrasive materials since these can degrade the quality of the mask and headgear over time.
Rinse Thoroughly and Air Dry in a Clean Area
Rinse the mask and headgear thoroughly under running water to ensure all soapy residue is removed. Shake off any excess water and air dry them on a clean towel or drying rack out of direct sunlight. Ensure they are fully dry before you reassemble them, as trapped moisture can lead to bacterial growth.
Wash the Tubing
Your tubing can be cleaned using a specialised tube brush or by rinsing it with warm, soapy water. If using a crush, make sure to gently scrub the entire length of the tubing interior. This will help remove any built-up residue or bacteria.
Rinse the Tubing Thoroughly and Hang to Dry
After washing, rinse the tubing thoroughly with clean, warm water. Make sure all soap residue is rinsed away. Gently shake off excess water and hang the tubing in a well-ventilated area to air dry, preferably away from direct sunlight.
3. Cleaning the Humidification System (if applicable)
If your CPAP machine includes a humidification system, this component also requires regular cleaning. This is crucial since standing water can become a breeding ground for bacteria, mould, and other microorganisms. Here’s a simplified process for cleaning the water chamber:
Empty and Clean the Water Chamber
Disconnect the water chamber from the humidifier carefully to avoid water getting into the machine. Discard any leftover water. Then fill it with a mix of mild soap and warm water. Gently swish the soapy water around in the water chamber to clean it. Many chambers are dishwasher-safe, but make sure to confirm this by checking your machine’s user manual.
Rinse and Air Dry the Chamber
Thoroughly rinse out the soapy water from the chamber under warm running water until all suds are gone. Once rinsed, turn it upside down on a clean, dry towel and let it air-dry out of direct sunlight.
4. Cleaning the CPAP Machine
Finally, it’s time to give your CPAP machine itself some attention. While it doesn’t require as thorough a cleaning as your mask or humidifier, regular wipe-downs help maintain its lifespan and performance. Here’s the way to go about it:
Wipe the Exterior of the Machine
With a clean, slightly damp cloth, gently wipe the outer surface of your CPAP machine. This helps keep away any dust accumulation that may affect its performance. Avoid any kind of moisture entering the machine.
Ensure Vents and Filters are Clean and Unblocked
Inspect the vents and filters to ensure they’re dust-free and unobstructed. If your machine has a disposable filter, replace it as recommended by the manufacturer. Some devices also come with a non-disposable filter, which should be washed with warm soapy water, rinsed under running water, squeezed out, and left to air dry.
Check the Manufacturer’s Guidelines for Specific Cleaning Recommendations
Finally, always consult your machine’s user manual or manufacturer’s recommendations. Different machines may have specific cleaning and maintenance instructions. Following these can prevent any inadvertent damage during the cleaning process.
5. Reassembly
The last step in maintaining your CPAP machine’s cleanliness is reassembling it for use. Here’s how to safely put back together all the individual components you just finished cleaning:
Allow All Components to Dry-Completely Before Reassembling
After cleaning, give all your disassembled components enough time to air dry completely before putting them back together. This is critical because any leftover moisture can encourage the growth of mould and bacteria, or potentially damage the electronic parts of your machine.
Reattach the Mask, Headgear, Tubing, and Water Chamber (if applicable)
Once they are completely dry, reassemble all your machine’s components. Again, it’s helpful to refer to your user guide during this step to avoid accidentally damaging any part of the machine. Carefully connect all the components to their rightful places, double-checking all connections.
Once all the parts are reassembled, your CPAP machine is ready to provide you with another night’s worth of efficient sleep therapy. By keeping up with this regular cleaning routine, you’ll prolong your machine’s life, improve your overall therapy performances, and ensure your health remains uncompromised.
Tips for Effective Cleaning
Besides following the specific steps for cleaning your CPAP machine, there are certain best practices or tips that can guide you towards more effective cleaning and maintenance of your device. These tips go a long way in ensuring the longevity and efficiency of your machine while providing you with the most hygienic sleep therapy experience.
1. Use Distilled Water in the Humidification System to Prevent Mineral Buildup
Ordinary tap water often contains minerals that can build up in your machine’s water chamber over time. This buildup can lead to performance issues and may even reduce the lifespan of your machine. Using distilled water helps avoid this problem and keeps your humidification system functioning optimally.
2. Avoid Using Harsh Chemicals, Bleach, or Scented Soaps
When it comes to cleaning your CPAP machine and its components, more isn’t always better. Extra-strong chemicals, bleach or heavily scented soaps can damage your machine’s parts or leave residues that may affect your therapy or cause irritation. Stick to mild, unscented soaps and warm water for the best results.
3. Regularly Inspect Components for Wear and Tear, Replacing as Needed
Wear and tear are a part of life for any frequently used device. Regularly inspect your CPAP components for any signs of degradation – like cracking, warping, or discolouration – and replace them as needed.
4. Keep the CPAP Machine in a Clean and Dust-Free Environment
Where you store your CPAP machine when not in use can significantly affect its cleanliness and lifespan. Keep it in a clean, dust-free environment to reduce the amount of cleaning needed and ensure it’s always ready for use. Avoid areas with excessive heat or humidity, which can potentially damage the machine.
By adhering to these simple yet effective tips, you ensure not only a clean machine but also an effective therapy session each night, allowing you to reap all the benefits of your CPAP therapy.
Make the Healthy Choice with Rockingham CPAP!
Experience the difference that a well-maintained CPAP machine can make it your life. With better hygiene, increased comfort, and the assurance of optimally functioning equipment, you can unlock the full potentials of your sleep therapy.
Don’t compromise on the quality of your rest – choose us, Rockingham CPAP, as your reliable partner in maintaining efficient and clean CPAP therapy. We are committed to providing the best products, services, and guidance for your CPAP needs.
Remember, when you choose us, you’re choosing to prioritise your health, your comfort, and most importantly, your peace of mind. Sleep well and breathe easy, knowing Rockingham CPAP has your back!
So, what are you waiting for? Make the switch to a cleaner, healthier CPAP experience. Contact us today and let us show you the Rockingham difference.